


By Leaves of Lorain
I love Halloween. To be precise, I love the costumes.
I’ve done everything from Queen Amidala to a rock star to Cat Woman.
I get around a bit.
This year, my debate on what costume to do started about three months later then normal - in the middle of February.
Maybe I obsess too much??
Na
I went through a couple different options before sitting down one day as saying to my self, “Self, you should do Robin for Halloween.”
That was about mid-May, and I haven’t been able to stop thinking about it since!!
I’m really happy with my choice this year, and for the first time ever, super excited!!
HOLY RESREACHING ROBIN, BATMAN!
I had in mind to do a straight up replica of Robin’s garb.
so
I started with a lot of research.
I’m a fan of Robin. I have a preference to Batman over Superman any day, but Robin’s my guy. I’d rather be the sidekick who can say the one liners, do the childish things and enjoy life.
So anyway, my research wasn’t on the various Robins, but Robin’s costume. Of which I found waaaaaayyyy too many variations!!!
Not only does every comic book Robin have a different look, but all the film Robins have different looks, as do many of the fan pictures, costumes, and cosplayers!


After thinking about it for a while, I decided that rather then trying to pull of a guy look, I was going to design my own Robin costume and make it decidedly female.
CONSEPT
I had a couple different things in mind when designing this costume.
1) I want to look female/sexy with out being overly exposed in a skin tight mini skirt and low cut bodice (like most of the female variations I came across in my research) which ties in with reason # 2 --
2) I want this to be a functional costume that could conceivably be worn as an actual super hero outfit. In other words, I want to look sexy and still be able to kick your butt.
3) I want this costume to be something that will stand up in the line of Robin costumes. Upholding the Robin tradition of comics and films.
So this is what I came up with.

What do you think?
The proportions are a little off because I was in flurry of creativity. He he.
COLORS, COLORS, COLORS AND FABRIC
Colors are the key to classic Robin’s costume. (with a few other basic elements)
I knew what kind of fabric I wanted for the costume (Knit) because it comes in the bright colors I want, and it also has the right feel and look to it.
I wanted satin for the cape, of course!

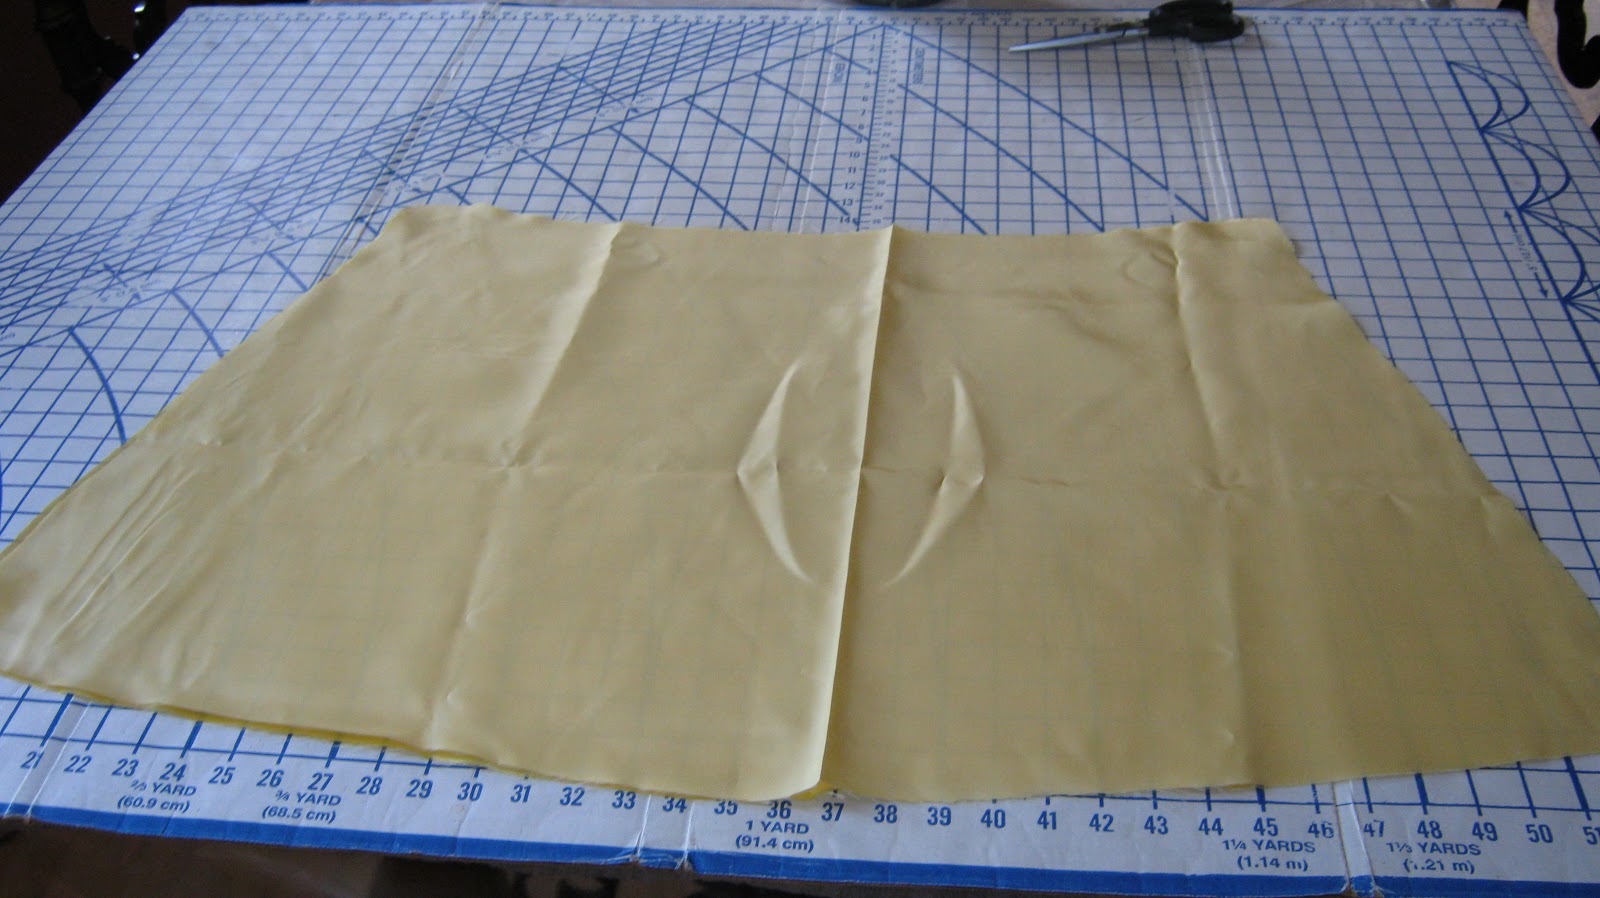
I was able to find everything perfectly - bright green, bright red, dark black, and a light yellow (not gold!) for the cape.
IT’S SEW TIME!!
Leggings
I worked on the leggings first.
I have since vowed to never make another pair again!!
They turned out alright, but I discovered that you should always check to make sure the fabric you think is double stretch really does stretch both ways!!

I used a pair of my leggings for a guideline, and they worked out well. The cut leggings look a bit like a lop-sided triangle.
I also added a few inches to both top and bottom for hems.
Wide band of elastic at the waist


Cape
The cape is wider then it is long (due to the skirt, I chose to go with a shorter cape)
I measured across my shoulders and added about 4 inches in either direction for width.
For length, I went from shoulder seem to mid butt.

I self lined the cape, sewed it together, pressed and then top-stitched to make it lay flat.

My mom helped me gather it in at the shoulders and I stitched it to get the gathers to lay correctly.
I used Snap Tape to attach the cape to the tunic shoulders.


Tunic/Leotard/collar/cap sleeves
I started with finding a really long shirt that fits my curves really well and was high necked.
I used that as my pattern and added a few inches to the bottom and sides for seems.
I sewed the shoulder together and split the back for my zipper, and widened the neck hole a little bit.
The collar I used from Simplicity 4942 for the basic shape, but did some modification to make it fit correctly.

I cut the collar in one piece (it looked a bit like a bat symbol!), cut two of fabric and one of interfacing. Then I cut them all in half.

The collar will be in two pieces because the zipper is going all the way up the back into the collar.
I sewed it them together, and top-stitched to lay flat.
I pinned the collar into the neck of the tunic and sewed it down. It was hard to get it centered with out a marker, so it ended up a bit off center, which screwed up my pattern.
Oh well.
That’s how you can tell I’m a real super hero - my costume was handmade!!
That’s my story and I’m sticking to it.

I put the zipper in next. I think next time I will go with a shorter zipper.

I sewed the sides together and it looked something like a tunic.

After three hours of work, this was the shape that came out.


I started out by cutting out the sides where my legs would be, then sewing the bottom together. I then took in the sides to match my curves and worked on the shoulders and seems.
My siblings got tired of me yelling ‘I need a zip!!”
They told me next time to make it so it fit the first time.
I love you guys.
I added the cap sleeves in green after I finalized the tunic. I laid the tunic down on my green fabric and tried the match the shape of the sleeves to the tunic. I had pin and re-pin them a few times before I was happy with the placement and sewed them down.

I roll hemmed every rough edge on the tunic and sleeves.
Skirt
I used a skirt of mine as a pattern (I recommend using a circular one)
Sewed the sides up, put in the elastic waist band, edited the length, and then cut out my ‘fluff’ and sewed it under the elastic band.


Utility Belt
Still is in need of utilities!!!
I measured my waist (wearing my full regalia at this point) and added two inches to either end, cut and sewed, then turned it and top stitched.
I did not use any interfacing so that it would fit my curves better.
I used hook and eyes for the closure.

Emblem
I designed my own version of Robin’s emblem and drew a full sized pattern which I cut out and used to trace my ‘R’, sewed the two circles on to my tunic and then traced everything with black fabric paint to make it pop.


I used heat adhesive interfacing on the back of the R and the braces to make them more sturdy.

The three braces or cross pieces or thingies (think classic Robin) were cut out, then roll hemmed and attached to the tunic.

Gloves
I cut two long strips of fabric (enough to cover my forearms all the way around and from finger tip to elbow) and basted them together, then narrowed them as needed for my wrist, using my own arm inside the ‘sleeve’ as a guide.
I narrowed between the fingers and the thumb as well, to create the look I wanted.
I roll hemmed the gloves and might add some embellishment later if I so feel.
Oh, do note, I made the gloves out of knit, so they stretch a bit. That’s important!!


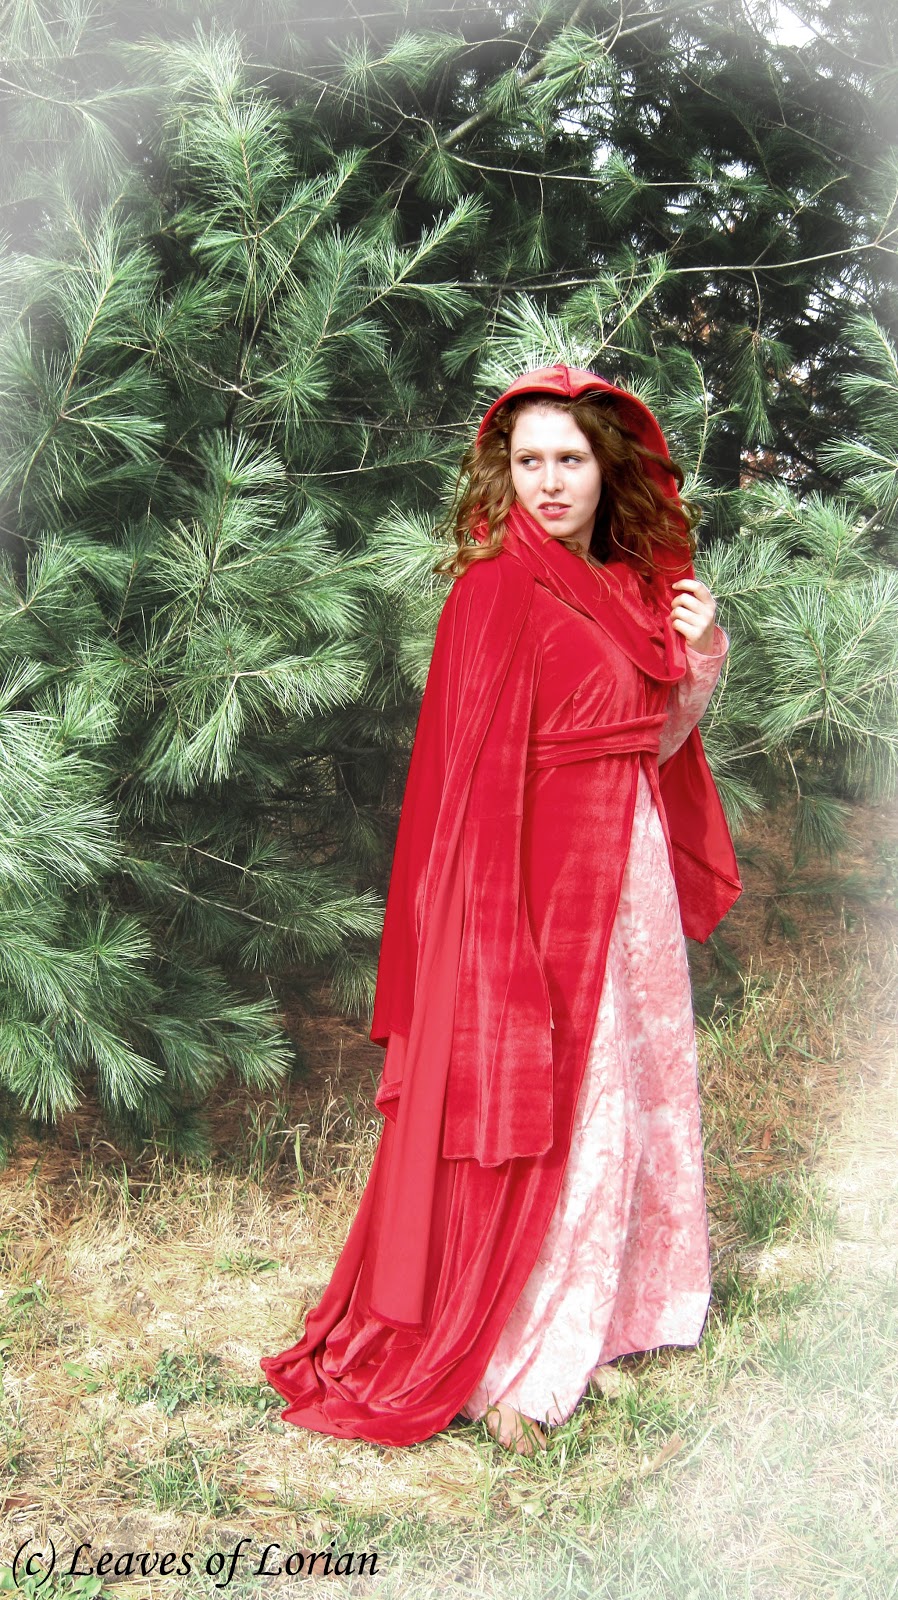
SUPERHERO TIME, BATMAN!!!
Here I am, in all my sidekick glory, ready to battle some supervillians!!
GO GOOD GUYS!!


I better get my boyfriend in his Batman suit over here soon…
I love Halloween. To be precise, I love the costumes.
I’ve done everything from Queen Amidala to a rock star to Cat Woman.
I get around a bit.
This year, my debate on what costume to do started about three months later then normal - in the middle of February.
Maybe I obsess too much??
Na
I went through a couple different options before sitting down one day as saying to my self, “Self, you should do Robin for Halloween.”
That was about mid-May, and I haven’t been able to stop thinking about it since!!
I’m really happy with my choice this year, and for the first time ever, super excited!!
HOLY RESREACHING ROBIN, BATMAN!
I had in mind to do a straight up replica of Robin’s garb.
so
I started with a lot of research.
I’m a fan of Robin. I have a preference to Batman over Superman any day, but Robin’s my guy. I’d rather be the sidekick who can say the one liners, do the childish things and enjoy life.
So anyway, my research wasn’t on the various Robins, but Robin’s costume. Of which I found waaaaaayyyy too many variations!!!
Not only does every comic book Robin have a different look, but all the film Robins have different looks, as do many of the fan pictures, costumes, and cosplayers!


After thinking about it for a while, I decided that rather then trying to pull of a guy look, I was going to design my own Robin costume and make it decidedly female.
CONSEPT
I had a couple different things in mind when designing this costume.
1) I want to look female/sexy with out being overly exposed in a skin tight mini skirt and low cut bodice (like most of the female variations I came across in my research) which ties in with reason # 2 --
2) I want this to be a functional costume that could conceivably be worn as an actual super hero outfit. In other words, I want to look sexy and still be able to kick your butt.
3) I want this costume to be something that will stand up in the line of Robin costumes. Upholding the Robin tradition of comics and films.
So this is what I came up with.

What do you think?
The proportions are a little off because I was in flurry of creativity. He he.
COLORS, COLORS, COLORS AND FABRIC
Colors are the key to classic Robin’s costume. (with a few other basic elements)
I knew what kind of fabric I wanted for the costume (Knit) because it comes in the bright colors I want, and it also has the right feel and look to it.
I wanted satin for the cape, of course!

I was able to find everything perfectly - bright green, bright red, dark black, and a light yellow (not gold!) for the cape.
IT’S SEW TIME!!
Leggings
I worked on the leggings first.
I have since vowed to never make another pair again!!
They turned out alright, but I discovered that you should always check to make sure the fabric you think is double stretch really does stretch both ways!!

I used a pair of my leggings for a guideline, and they worked out well. The cut leggings look a bit like a lop-sided triangle.
I also added a few inches to both top and bottom for hems.
Wide band of elastic at the waist


Cape
The cape is wider then it is long (due to the skirt, I chose to go with a shorter cape)
I measured across my shoulders and added about 4 inches in either direction for width.
For length, I went from shoulder seem to mid butt.
I self lined the cape, sewed it together, pressed and then top-stitched to make it lay flat.

My mom helped me gather it in at the shoulders and I stitched it to get the gathers to lay correctly.
I used Snap Tape to attach the cape to the tunic shoulders.


Tunic/Leotard/collar/cap sleeves
I started with finding a really long shirt that fits my curves really well and was high necked.
I used that as my pattern and added a few inches to the bottom and sides for seems.
I sewed the shoulder together and split the back for my zipper, and widened the neck hole a little bit.
The collar I used from Simplicity 4942 for the basic shape, but did some modification to make it fit correctly.

I cut the collar in one piece (it looked a bit like a bat symbol!), cut two of fabric and one of interfacing. Then I cut them all in half.

The collar will be in two pieces because the zipper is going all the way up the back into the collar.
I sewed it them together, and top-stitched to lay flat.
I pinned the collar into the neck of the tunic and sewed it down. It was hard to get it centered with out a marker, so it ended up a bit off center, which screwed up my pattern.
Oh well.
That’s how you can tell I’m a real super hero - my costume was handmade!!
That’s my story and I’m sticking to it.

I put the zipper in next. I think next time I will go with a shorter zipper.

I sewed the sides together and it looked something like a tunic.

After three hours of work, this was the shape that came out.


I started out by cutting out the sides where my legs would be, then sewing the bottom together. I then took in the sides to match my curves and worked on the shoulders and seems.
My siblings got tired of me yelling ‘I need a zip!!”
They told me next time to make it so it fit the first time.
I love you guys.
I added the cap sleeves in green after I finalized the tunic. I laid the tunic down on my green fabric and tried the match the shape of the sleeves to the tunic. I had pin and re-pin them a few times before I was happy with the placement and sewed them down.

I roll hemmed every rough edge on the tunic and sleeves.
Skirt
I used a skirt of mine as a pattern (I recommend using a circular one)
Sewed the sides up, put in the elastic waist band, edited the length, and then cut out my ‘fluff’ and sewed it under the elastic band.


Utility Belt
Still is in need of utilities!!!
I measured my waist (wearing my full regalia at this point) and added two inches to either end, cut and sewed, then turned it and top stitched.
I did not use any interfacing so that it would fit my curves better.
I used hook and eyes for the closure.

Emblem
I designed my own version of Robin’s emblem and drew a full sized pattern which I cut out and used to trace my ‘R’, sewed the two circles on to my tunic and then traced everything with black fabric paint to make it pop.


I used heat adhesive interfacing on the back of the R and the braces to make them more sturdy.

The three braces or cross pieces or thingies (think classic Robin) were cut out, then roll hemmed and attached to the tunic.

Gloves
I cut two long strips of fabric (enough to cover my forearms all the way around and from finger tip to elbow) and basted them together, then narrowed them as needed for my wrist, using my own arm inside the ‘sleeve’ as a guide.
I narrowed between the fingers and the thumb as well, to create the look I wanted.
I roll hemmed the gloves and might add some embellishment later if I so feel.
Oh, do note, I made the gloves out of knit, so they stretch a bit. That’s important!!


SUPERHERO TIME, BATMAN!!!
Here I am, in all my sidekick glory, ready to battle some supervillians!!
GO GOOD GUYS!!


I better get my boyfriend in his Batman suit over here soon…


